In this guide 5 sections
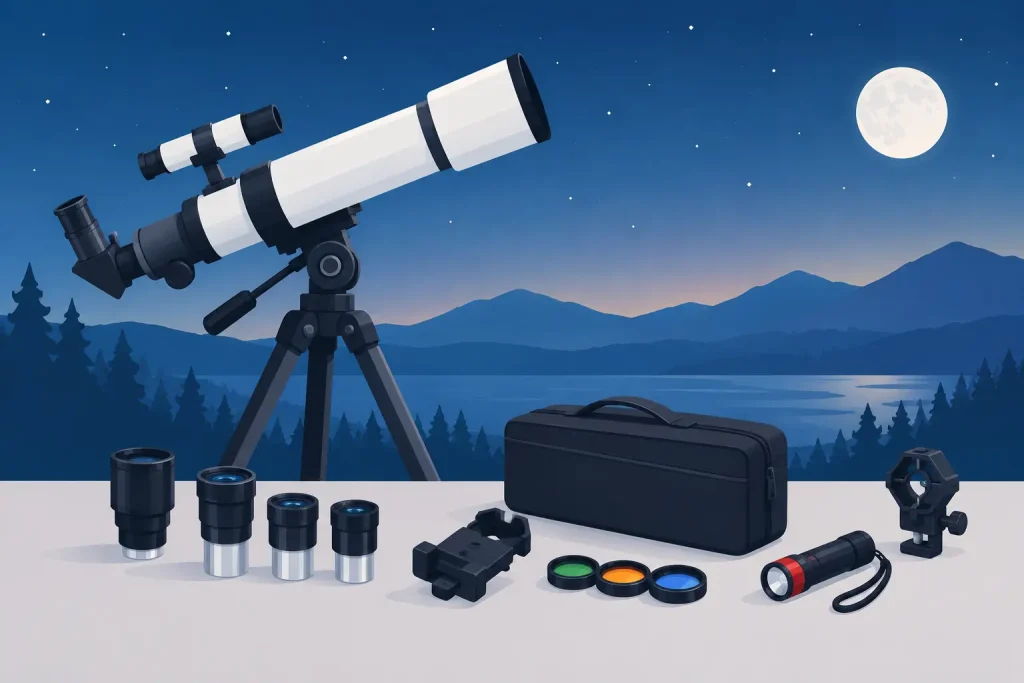
The first clear view of Saturn’s rings can make a backyard feel like the edge of the solar system. But a beginner telescope rarely arrives perfectly equipped for that moment. The right essential telescope accessories for beginners help you find objects faster, focus more comfortably, protect the equipment, and spend more time looking up instead of troubleshooting in the dark.
The key is to buy for your telescope and your observing habits, not for a crowded accessory case. A modest telescope with one useful eyepiece, a steady mount, and a good sky guide can reveal more than an over-accessorized setup that is difficult to use. Start with the tools that solve real problems, then add specialized gear as your confidence grows.
Start With Accessories That Improve Every Session
A red flashlight protects your night vision
Your eyes need time to adapt to darkness. A bright white porch light, phone screen, or regular flashlight resets that adaptation quickly, making faint stars and nebulae much harder to see. A dim red flashlight is one of the least expensive upgrades with one of the biggest practical payoffs.
Choose a model with adjustable brightness and use the lowest setting that lets you read a chart or identify an eyepiece. Red light preserves far more night vision than white light, though it is not magic – a very bright red light can still be distracting. If you use a phone astronomy app, enable its red-screen mode and reduce the display brightness as much as possible.
A star chart or astronomy app gives the telescope a purpose
A telescope does not find objects for you unless it has a computerized GoTo mount that is correctly aligned. Even then, knowing what is above the horizon turns an observing session from random pointing into a small expedition through the sky.
A printed planisphere is especially friendly for beginners. Set it for the date and time, and it shows the stars visible from your location. It needs no battery, remains readable in cold weather, and teaches the shape of the seasonal sky. An astronomy app adds object details, observing alerts, and a searchable catalog, but it is best used carefully under dark conditions. Many observers use both: the planisphere for orientation and the app for planning a target.
A comfortable observing chair reveals more detail
This accessory is often overlooked because it is not optical, yet it can transform what you see. When you are standing awkwardly, bending over an eyepiece, or trying to hold a child at the right height, subtle planetary detail becomes difficult to notice. A height-adjustable observing chair or sturdy stool keeps your eye positioned steadily at the eyepiece.
Comfort matters most during long lunar, planetary, and deep-sky sessions. It also slows you down in a useful way. Your eyes often need a minute or two at the eyepiece before faint features become apparent, especially on galaxies and nebulae.
Essential Telescope Accessories for Better Views
Add one quality eyepiece before building a collection
Most beginner telescopes include two eyepieces, commonly a low-power option and a higher-power option. They are enough to get started, but the included high-power eyepiece can be uncomfortable or offer a narrow field of view. One well-chosen additional eyepiece is usually a smarter purchase than a large budget set.
Eyepiece focal length controls magnification. Divide your telescope’s focal length by the eyepiece focal length to calculate it. For example, a 900 mm telescope used with a 25 mm eyepiece provides 36x magnification. With a 10 mm eyepiece, it provides 90x.
For most beginners, a medium-power eyepiece around 10 to 15 mm fills the gap between a wide, low-power finder eyepiece and a very high-power one. The best focal length depends on your telescope’s focal length and the eyepieces you already own. Look for a comfortable eye relief if you wear glasses, and confirm whether your telescope accepts 1.25-inch or 2-inch eyepieces. Most entry-level scopes use the 1.25-inch format.
Do not chase extreme magnification. Atmospheric turbulence, called seeing, often limits useful magnification long before the number printed on a telescope box. On many nights, 100x to 150x produces a sharper, more satisfying view of Jupiter or Saturn than 250x. A crisp image at moderate power beats a large, dim, shaky image every time.
Use a Barlow lens selectively
A Barlow lens multiplies the magnification of existing eyepieces, commonly by 2x. It can be a cost-effective way to expand a small eyepiece collection. For instance, a 25 mm and 10 mm eyepiece paired with a 2x Barlow can effectively provide 25 mm, 12.5 mm, 10 mm, and 5 mm options.
The trade-off is that inexpensive Barlows can soften the image, and doubling a very short eyepiece may create more magnification than your telescope or local sky can support. A good Barlow is useful when it creates sensible steps in magnification. It is not a shortcut to turning a small telescope into an observatory instrument.
A Moon filter makes lunar observing more relaxed
The Moon is bright enough to cause eye strain or temporary glare through a telescope, particularly around first quarter through full Moon. A neutral-density Moon filter reduces brightness so you can study craters, mountain shadows, and the rugged line between lunar day and night with more comfort.
A variable-polarizing filter offers adjustable dimming, which is handy because lunar brightness changes with phase and magnification. This is a comfort accessory rather than a requirement – viewing the Moon without one will not damage your eyes through a normal telescope. Still, many beginners find that a filter makes extended lunar sessions far more enjoyable.
Skip most color filters at first
Colored planetary filters can increase contrast in specific features, such as cloud belts on Jupiter or surface markings on Mars. They are interesting tools, but they are not among the first accessories most newcomers need. Their effect can be subtle, they reduce overall brightness, and they work best when you already know what features you are trying to detect.
If your interests eventually lean toward planets, a quality neutral-density filter, a Moon filter, or a simple contrast-enhancing filter is often a more approachable first step. For deep-sky observing, a nebula filter can be worthwhile later, but its usefulness depends heavily on the targets, telescope aperture, and local light pollution.
Protect the Optics and Keep the Setup Working
A basic accessory kit should include a dust cap for the telescope, caps for every eyepiece, and a padded case or compartmented bag. Dust is usually less harmful than enthusiastic cleaning. Keep caps on when the equipment is not in use, store everything in a dry place, and avoid wiping lenses unless there is a visible need.
For occasional cleaning, use a hand-operated air blower first, then a soft optical brush or clean lens tissue designed for optics. Never use a shirt, paper towel, household glass cleaner, or canned compressed air on telescope optics. Mirrors and lens coatings are delicate, and a small amount of dust rarely affects the view as much as a scratched coating can.
Dew control becomes essential in humid regions, during cool nights, and in many parts of the US where grass and open ground release moisture after sunset. Start with a dew shield, particularly for refractor and Schmidt-Cassegrain telescopes. It blocks stray light and slows the formation of dew. If you regularly observe for hours in damp conditions, a powered dew heater strip and controller may be the next logical upgrade.
Power is another practical detail. Computerized mounts, cooling fans, and dew heaters can drain batteries faster than expected in cold weather. Keep a suitable power bank or fresh batteries available, but check your mount’s voltage and connector requirements before connecting anything. The wrong power supply can damage electronics.
Small Tools That Prevent Big Frustrations
A few compact items earn their place in nearly every observing bag:
- A notebook and pencil for recording targets, sky conditions, and successful settings.
- A microfiber cloth for exterior surfaces and accidental fingerprints on non-optical parts.
- A small bubble level if you use a GoTo mount that benefits from a level starting position.
- Insect repellent, warm layers, and a thermos for comfortable outdoor sessions.
- A portable power source for compatible electronics and an emergency backup light.
The notebook may sound old-fashioned, but it builds observing skill quickly. Record the date, location, telescope, eyepiece, weather, and what you noticed. Over several sessions, you will learn which magnifications work best on your equipment, how local light pollution affects targets, and where the Moon’s changing shadows reveal the most dramatic detail.
Buy for Your Telescope, Not for the Marketing Photo
Before adding accessories, identify your telescope type, aperture, focal length, eyepiece barrel size, mount style, and any included components. A 6-inch Dobsonian, a compact tabletop reflector, and a computerized refractor benefit from different upgrades. A manual Dobsonian owner may gain the most from a better finder and observing chair, while a GoTo refractor owner may prioritize dependable power and accurate alignment tools.
Be cautious with bundled kits that promise dozens of accessories for a low price. They can be a convenient introduction, but their weakest eyepieces, filters, and plastic cases are often the items that go unused. Put your budget toward a few pieces that improve your actual view or make the telescope easier to operate.
A final safety rule deserves to be explicit: never point a telescope at the Sun without a properly fitted, full-aperture solar filter made specifically for your telescope. Eyepiece solar filters are unsafe. Solar observing can be spectacular, but it requires purpose-built protection and careful setup.
Your first accessories should make the night sky feel more accessible, not more complicated. Start with a red light, a way to navigate the sky, comfortable seating, and one thoughtfully selected optical upgrade. Then let the Moon, Saturn, bright clusters, and your own growing curiosity tell you what belongs in the next chapter of your observing kit.